Find the one bottleneck killing your revenue.
30-minute free strategy call with Charles. We diagnose your highest-leverage AI bottleneck, install Charlie OS live on your Mac or Windows in one hour, and map your exact next 30 days, all on the same call.
Your thumbnail is the reason nobody’s clicking your video. Not your content. Not your editing. Your thumbnail.
I’m Charles Dove, and on my YouTube channel @charlieautomates, I showed exactly how I create MrBeast-quality thumbnails using AI. The whole process takes under 10 minutes. No design skills required.
Here’s the full breakdown of the tools, the workflow, and the iteration loop that gets you from a phone selfie to a scroll-stopping thumbnail.
The Two Tools You Need
You don’t need Photoshop. You don’t need a designer on retainer. You need two things:
- Nano Banana Pro for AI image generation and editing
- A custom ChatGPT agent I built called Viral Thumbnail Pro
That’s it. The agent is trained on the thumbnail formulas used by the biggest creators on YouTube. MrBeast. Mr. Who’s the Boss. Dude Perfect. It’s trained by the same people who create their thumbnails.
This isn’t some random prompt I threw together. This is a system that coaches you through every step of the thumbnail creation process. It picks your best photo. It suggests your concept. It writes your prompt. It scores your output. And it tells you exactly what to fix.
The Three Thumbnail Concepts That Actually Work
When you fire up Viral Thumbnail Pro and tell it you want to create a thumbnail, it gives you three proven concepts to choose from:
Concept A: The Question. This is the curiosity play. Your thumbnail makes people ask “how?” or “what?” before they even read the title. Think split screens, before/after reveals, or a surprising result that demands explanation.
Concept B: Shock Reveal. This one hits emotion first. A dramatic facial expression. An unexpected object. Something that breaks the pattern of what people expect to see when they’re scrolling.
Concept C: Cliffhanger Outcome. You show just enough to make someone need to know what happens next. A partial reveal. A teaser. The human brain can’t resist an open loop.
For the Charlie Automates thumbnail on this video, I went with Concept A. The idea was simple: “How to create thumbnails like MrBeast using AI.” But the agent immediately told me to shorten the title to under 50 characters. Good catch.
I landed on “Steal MrBeast’s Thumbnail Formula.” Short. Punchy. Curiosity-driven.
The Step-by-Step Process (Exactly What I Did)
Here’s the exact workflow I walked through live in the video. No gatekeeping.
Step 1: Take Your Photos
I pulled out my phone right on camera. Took a few selfies with expressive faces. One was kind of bad, so I took another one. Nothing fancy. Just phone photos with natural lighting and a clear expression.
The key here is expression. Thumbnails live and die on facial reactions. Exaggerated surprise, excitement, shock. The bigger, the better. MrBeast’s team knows this. Now you do too.
Step 2: Upload Your Assets
I AirDropped my photos to my computer and dragged them straight into the Viral Thumbnail Pro chat. Then I asked it: “Which one do you like best?”
It analyzed all the images and picked the winner. In my case, it chose image 8347. The agent doesn’t just pick randomly. It evaluates based on facial expression clarity, lighting, and how well the photo will composite into a thumbnail layout.
Step 3: Get Your Asset Recommendations
Once you’ve got your base photo selected, the agent tells you what else to add. It said I should pick two to three assets total:
- A proof asset (something that validates the claim)
- A formula asset (something that represents the method)
- A MrBeast cue (something that ties back to MrBeast visually)
It also told me what NOT to add. That’s just as important. Cluttered thumbnails kill click-through rates.
Step 4: Build Your Supporting Assets
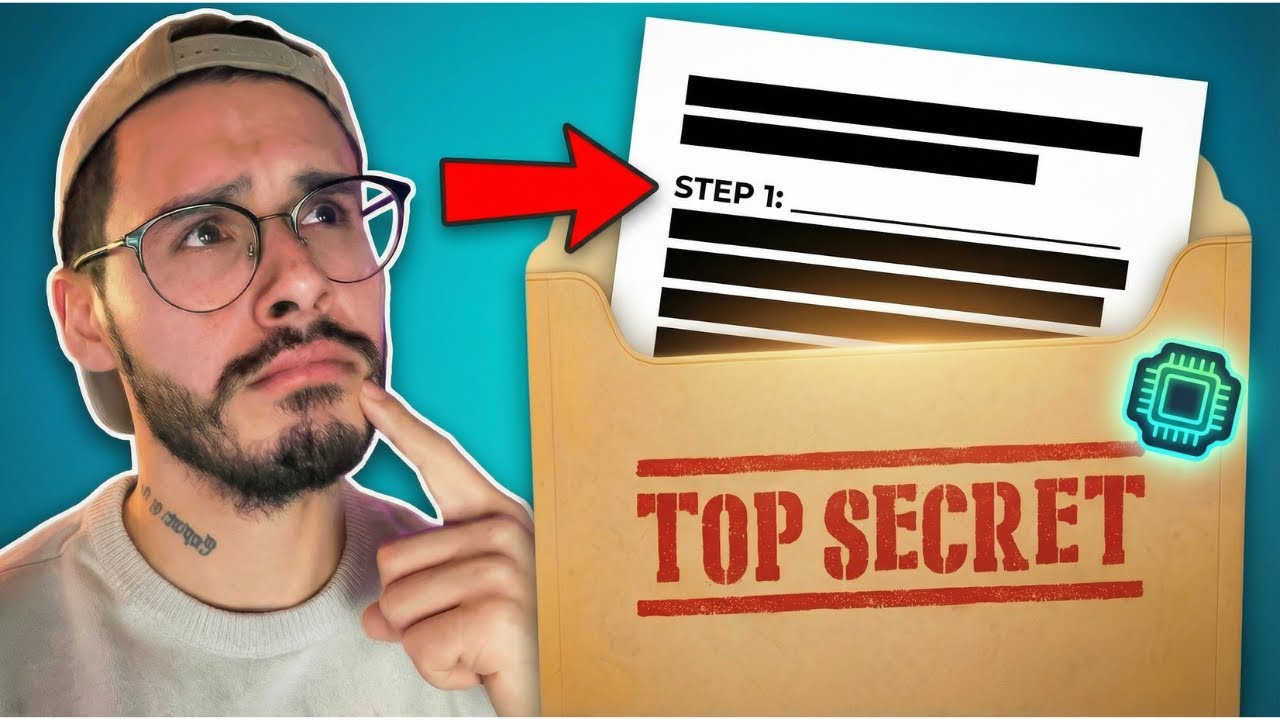
I needed something that looked like a “secret formula” visual. So I jumped into Canva, grabbed a Manila folder element, slapped “TOP SECRET” on it, and downloaded it. Took about 30 seconds.
The first version was too flat. The agent agreed and suggested I remove the extra text and keep just the “TOP SECRET” stamp. Simpler is almost always better with thumbnails.
Step 5: Generate Your First Thumbnail
Here’s where Nano Banana Pro comes in. I took the prompt that Viral Thumbnail Pro generated, attached my two images (the selfie and the top secret folder), and let it rip.
The settings matter here. I set it to 2K resolution for the original creation. Then I clicked generate and waited.
The first result looked pretty good. But the agent rated it a 7.6 out of 10.
Step 6: The Iteration Loop (This Is Where the Magic Happens)
Here’s what separates this system from just throwing images into an AI generator and hoping for the best.
Viral Thumbnail Pro won’t give you a deliverable until it scores at least an 8 out of 10. That’s a rule I built into the agent. If it’s not at least an 8, you’re not posting it.
The agent gave me specific feedback on what to fix. More contrast on the face. Adjust the sizing. Add highlights. It even wrote the exact prompt I should use for the next iteration.
All I did was click “edit” in Nano Banana Pro, paste the revision prompt, and wait.
The second version came back with better face contrast, a white outline around my cutout, and better sizing. The agent rated it an 8.2. Post ready.
But I pushed it. “What could we do to make it a 10 out of 10, bro?”
So it gave me another prompt. Same process. Click edit. Paste prompt. Wait.
The third version came back and scored a 9.1 out of 10. That’s the one I used.
Why This Iteration Process Matters
Most people generate one thumbnail and call it done. That’s a mistake.
The difference between a 7.6 and a 9.1 might seem small on paper. But in practice, that’s the difference between 2% and 8% click-through rate. On a video with 10,000 impressions, that’s 200 clicks vs. 800 clicks. Same content. Same title. Just a better thumbnail.
The iteration loop is three steps:
- Generate the initial thumbnail
- Get scored feedback from the agent
- Apply the revision prompt and regenerate
I typically do this two to three times. Original, one improvement, then a final push. You don’t want to iterate forever because AI image generators start degrading quality after too many edits. Three rounds is the sweet spot.
The Prompt Structure That Gets Results
The prompts Viral Thumbnail Pro generates aren’t random. They follow a specific structure:
Scene setup. What’s the background? What’s the mood? What’s the lighting?
Subject placement. Where does the person go? How big should they be? What’s the expression?
Supporting elements. What objects, text, or visual cues reinforce the thumbnail’s message?
Style direction. Color grading, contrast levels, glow effects, depth of field.
You don’t have to write these prompts yourself. The agent handles it. But understanding the structure helps you give better feedback during iteration.
What MrBeast’s Thumbnail Team Actually Does
Here’s what most people don’t realize about MrBeast’s thumbnails. He has a dedicated team that does exactly what I’m showing you here, just manually and with expensive tools.
They take multiple photos during the shoot. They test different expressions. They composite the best one onto a designed background. They iterate. They A/B test.
The formula is:
- One clear focal point (usually a face with a big expression)
- Maximum 3 elements total in the thumbnail
- Bold, contrasting colors that pop on a phone screen
- Minimal or zero text (the title does the text work)
- Curiosity gap between what you see and what you need to click to understand
That’s it. That’s the formula. And with AI, you can replicate it in under 10 minutes instead of hiring a team.
Quick Tips for Better AI Thumbnails
Tip 1: Always shoot your own photos. AI-generated faces look AI-generated. Your real face builds trust and recognition. Take 5-10 photos with different expressions and let the agent pick the winner.
Tip 2: Keep it to 3 elements max. Your face, one supporting object, and a background. That’s it. Every extra element reduces clarity on a phone screen.
Tip 3: Use high contrast. The thumbnail needs to pop at the size of a postage stamp. If you squint and can’t tell what’s happening, it’s too busy.
Tip 4: Test at mobile size. Over 70% of YouTube views start on mobile. Pull up your thumbnail on your phone before you post. If it doesn’t grab you at that size, go back and iterate.
Tip 5: Title and thumbnail work together. Your title shouldn’t repeat what’s in the thumbnail. They should complement each other. The thumbnail creates curiosity. The title gives just enough context to make someone click.
How I Use This for CC Strategic Clients
At CC Strategic, my AI automation agency, we’ve started applying this exact workflow for clients who create content. Agency owners, consultants, course creators. Anyone who needs thumbnails but doesn’t want to pay $50-100 per thumbnail to a freelance designer.
The whole system costs less than a single freelancer thumbnail per month. And you get unlimited iterations.
The Tools Breakdown
| Tool | What It Does | Cost |
|---|---|---|
| Nano Banana Pro | AI image generation and editing | Subscription-based |
| ChatGPT (Plus) | Runs the Viral Thumbnail Pro agent | $20/month |
| Canva (Free) | Quick asset creation for supporting elements | Free |
That’s three tools. Total cost is under $40/month. Compare that to hiring a thumbnail designer at $50-100 per thumbnail. If you’re posting weekly, that’s $200-400/month vs. $40/month.
Common Mistakes to Avoid
Don’t skip the scoring step. If the agent says it’s a 7, it’s a 7. Don’t post it because you’re tired of iterating. Push for at least an 8.
Don’t use AI-generated faces. They look uncanny. Use your real photos. AI should enhance, not replace your face.
Don’t add text to thumbnails. YouTube already shows your title. Text on thumbnails competes with the title and creates visual clutter. If you must use text, keep it to 1-3 words max.
Don’t ignore the asset recommendations. When the agent tells you to add a proof asset or remove clutter, listen. The recommendations are based on what actually works for top creators.
FAQ
Do I need to know how to use Photoshop?
No. The whole point of this workflow is that AI handles the compositing. You take photos, provide assets, and let the tools do the heavy lifting. If you can drag and drop files, you can do this.
Can I use this for any niche, not just tech/AI content?
Yes. The Viral Thumbnail Pro agent works across niches. Fitness, cooking, gaming, business, whatever. The thumbnail principles are universal: clear focal point, curiosity gap, high contrast, minimal elements.
How long does the whole process take?
Under 10 minutes once you’ve done it a few times. The first time might take 15-20 minutes as you learn the workflow. After that, it’s fast.
What if I don’t like the photos the agent picks?
Override it. The agent makes suggestions, but you have final say. If you prefer a different expression, go with it. The agent will work with whatever you choose.
Can I use someone else’s face or likeness in my thumbnail?
Be careful here. Using someone’s likeness without permission can create legal issues. For this video, I considered using MrBeast’s face but went with my own face plus a “top secret” asset as a visual cue instead. That’s the safer play.
What’s the difference between Nano Banana Pro and other AI image tools?
Nano Banana Pro is specifically good at editing existing images rather than generating from scratch. That “edit” feature is crucial for the iteration loop. You feed it an existing thumbnail and a revision prompt, and it modifies the image rather than creating a new one from nothing.
How do I get the Viral Thumbnail Pro agent?
I share resources like this inside the Charlie Automates community. Join CC Strategic AI on Skool to get access to the agent, prompts, and live support.
Start Making Better Thumbnails Today
Your content deserves to be seen. And the biggest barrier between your videos and your audience is a bad thumbnail. Not bad content. A bad thumbnail.
This system takes the guesswork out of thumbnail creation. You don’t need design skills. You don’t need expensive tools. You need a phone, two AI tools, and 10 minutes.
If you want help building systems like this for your content or business, there are two ways I can help:
Learn with me: Join CC Strategic AI on Skool for resources, live weekly calls, and a community of builders using AI to grow. Want it Done-For-You? Charlie OS ships my full Claude Code setup — skills, plugins, frameworks. Hit the VIP option inside Skool to grab it.
Get 1-on-1 coaching: if you want direct, personalized guidance on your AI workflow.
Stop posting thumbnails that don’t get clicked. Start using the same formula the biggest creators on the planet use. Just do it with AI in a fraction of the time.
Ready to install Charlie OS?
Stop reading. Start shipping.
The AI Bottleneck Protocol is a 30-minute free call. We pinpoint the one task eating the most hours and the most money in your business right now. We install Charlie OS live on your machine in under an hour. We map your exact path to fix the bottleneck on the same call. If we’re not a fit, you walk away with a clear diagnosis of where your business is leaking time and money. Either way, you win.